After about 2 days after getting my scala rider G4 kit (from cardo) I was absolutely astound how tinny the speakers that it comes with, not only this there is no easy way of replacing them either.
So for the rest of this page I will show you a step by step guide on how I modified my headset for any type of headphones you desire!
There are many ways this could have been done, cut the headphone wires and solder on a plug, open up the unit replace the entire cable with your new headphones or the way I did it and use the input plug and turn it into a output.
First Step, get your self some gear..
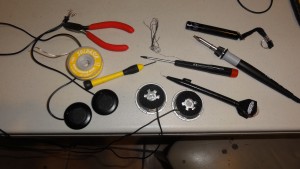
In this guide I used
- Cutters
- Solder
- Torch
- Solder Wick
- Small Flat head screw driver with fine tip
- Tork Screw Driver Size T6
- Soldering iron with fine tip
- Wax wire for easy use (Though normal wire would suffice)
- Multimeter (not show)
At the bottom of the image are the old set of headphones and the new ones that I replaced them with.
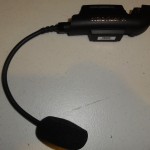
Take the head piece off your helmet 😉 flip it over and remove the only screw on the outercase with the hex screw driver.
Next is the tricky part of removing the metal cap holding the mic and the case together, I managed to wiggle the two parts apart carefully not to break the plastic.
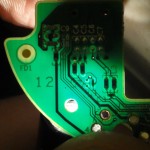
Remove the screw holding the board in the case, from here on in be careful not to stress the connection to the mic on the end of the board.
I took the 3.5mm jack off the board in the pictures to gain more insight on how the board works but you can leave it on since you will be following this guide.
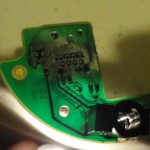
I used the torch to get a better idea on where the tracks run on the board (by shining it through the board), as you can see in the pictures there are 3 small tracks running side by side.
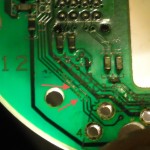
The 2 closes to the bottom we need to cut (left and right channel), don’t be angry if you damage the third as we can deal with that later.
I used the small flat head screw driver as this was the easiest tool I had at the time (click on the image to get a better view),
the middle track is best to scrape it back a bit as we need to join the outer two tracks.
The reason for this is the plug has a switch in it, when no plug is inserted it will short these two tracks , since we are repurposing this plug we need to make the unit think there is no plug inserted.
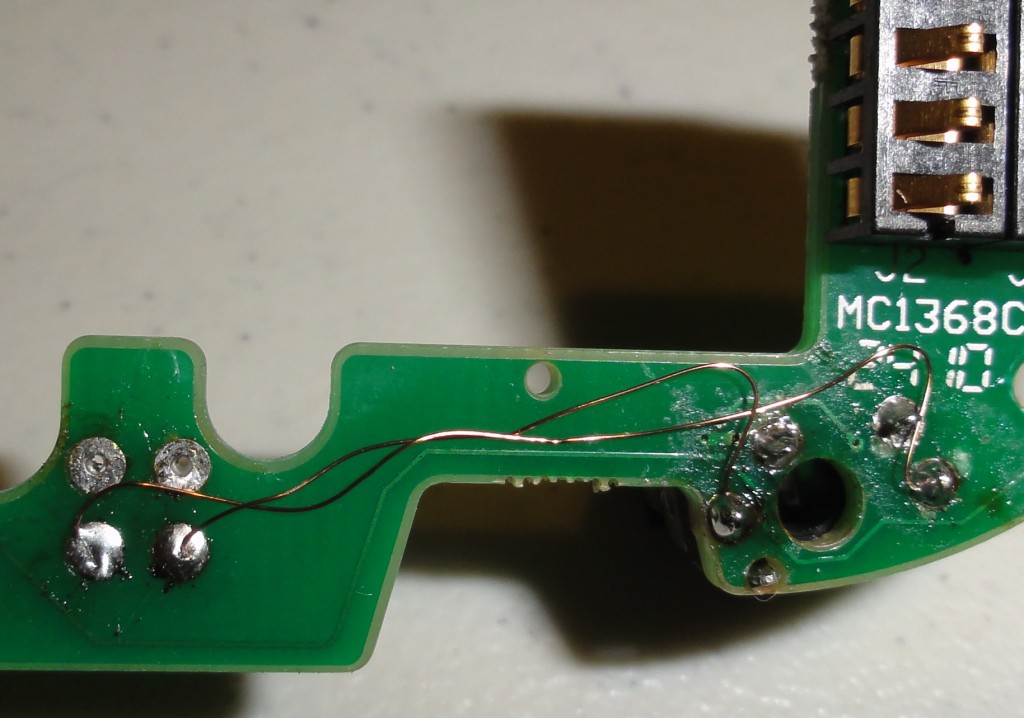
Without damaging the tracks underneath, scrape the protective coating of the two outer tracks and use a strand of wire to join them (the two outer wires)
Do Not Connect the middle track
If you have a multimeter handy check to make sure that you have removed the tracks from the audio connector and the link is working.
Now after all thats done, remove these wires!
I use the solder wick to suck each of the pads dry for easy removal.
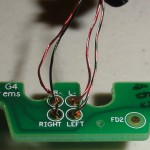
Now for the last part of this, connecting the wires to the connector.
Using the bottom two pads where the speakers were, connect them to the connector (see image for pins)
If you can’t follow the wires, the inner two are connected, and then the outer two.
Please note I’m using wax covered wires here, so yes they are touching but there is a coating on them so it doesn’t matter.
The easiest way to remove the coating on these types of wires is to melt it off, I usually get a big blob of solder on the iron and then run the wire through it where I want to eventually solder it to the board.
The final step is to put the unit back together, I left the mic metal collar off until I tested it with the unit to make sure all was working.
The disadvantage of this method is you loose the input but I use the bluetooth communications so it doesn’t worry me in the slightest.
If you are shy with a soldering iron then you also may run into some problems, though it’s a simple mod there is a bit of fine work that needs to be done.
Another thing to note is there is no chips that could be damaged on this breakout board so static charge and excessive heat wont hurt it to much.
Have fun 🙂
March 7th, 2012 at 6:24 am
ciao Hovo,
have you seen battery?
I need to replace it… fffff
what do you suggest about?
is it easy to open the device ?
enough to use a torque driver?
thanks
March 7th, 2012 at 8:20 am
I did remove the battery when opening the device, it’s easy to get to and remove…
But I say good luck finding a replacement as it looks to me to be custom made.
I will have a look around myself if I find some time.
March 22nd, 2012 at 6:27 pm
Ah, great! I supposed I wasn’t the first DIY idiot 😉 that was thinking in the lines of converting the, in my opinion, surplus input to an output. Why haven’t Cardo themselves thought about this? To have it switched in software would, after some minor adjustments to the hardware, be a nice feature!
March 22nd, 2012 at 6:36 pm
By the way, if I understand correctly the right speaker wire doubles as an antenna for the radio. Have you noticed if the radio was affected by this operation? One way is to solder a wire to the pad and tuck it into the helmet if needs be.
March 22nd, 2012 at 7:10 pm
Nope no effect for me,
There is no reason why you can’t use the speaker still.
To be TOTALY honest I don’t use the radio that much, maybe this is the reason why 😉
March 24th, 2012 at 11:08 am
It works like a charm! But geez how small everything was!
Found another way to do it too, http://advrider.com/forums/showthread.php?t=628028, but I think this is the nicest approach if you don’t need the MP3 jack.
June 26th, 2012 at 11:04 am
You the man for sharing this! 2 questions;
1) Where did you find replacement speakers? I tried some from my studio headphones (for music production) but they have very 2 red, 2 gold, 1 blue wire so couldn’t seem to power them or bad wiring.
2) What did you mean by “you lose the input” as I’ve not had any input on my G4 headsets, only Bluetooth.
Thanks again for the great mod instructions!
June 26th, 2012 at 11:59 am
1) Im in Aus so I purchased these speakers from here -> Koss: KSC-75, most headphones if you cut the wire will have coated wires. Having coated wires isn’t a massive problem but it is painful having to scrape the “paint” from each strand of wire, another solution that I have used is to get a big blob of solder on the end of my iron and just sit the wires in the molton solder for a while melting the coating away. So I’m thinking you havent removed enough of the protective coating thus you have no connection to the speakers.
2) On my headset there is/was a mp3 input port, I had no intention of using it as I have bluetooth comms for that. So I changed the board design to make it a output instead, thus not having to cut the original plug from the headphones (and the option to change to ear buds if I so desire, for longer trips).
May 2nd, 2014 at 2:53 am
Hi, wich speakers did you use to upgrade them??
May 2nd, 2014 at 12:56 pm
I used Koss: KSC-75 when doing this mod.
I have now moved on to using Sena SMH10 with Aiaiai Tracks.
In both the mods I had to trim the headphones down a bit to get the depth down in my helmet.